Showing posts with label food. Show all posts

Friday, February 25, 2011

Selma

This is Selma:
Selma is the name that Michal gave to my new kick-a$$ sourdough starter... think Selma Hayak!


First, I made her a cute outfit for her jar!  I felt it was important for my starter to be tough... but also stylish and cuddly!

I mixed 1/4 cup of dark rye flour and 1/4 cup of water, stirring it briskly to get air into the mixture... then set in a warm (not hot) area.
Selma started to look slightly bubbly (I'll take a picture next time) after about 25 hours... this can sometimes take much longer. I then gave her a first feeding of another 1/4 cup of flour and 1/4 cup warm water... and back in a warm place.  Some say you should feed your starter once a day, some say three times per day... I'll let you know how often I decide to feed after I see what keeps her happy.

I'll take some pictures as she develops and then we'll make some bread... I've been wanting to make some sprouted wheat sourdough bread!

To be continued...

This simple sourdough starter is being shared at the Simplicity Saturday blog hop:

Friday, February 18, 2011

Vanilla Pudding


After trying two vanilla pudding recipes (side-by-side), I was tempted to rewrite this post, listing the "Alternative Recipe" as the primary; the alternative being the clear favorite for Dad, Michael, and me.  However, I'm going to leave this post as I originally wrote it, as you may want to add protein to your desert by using the initial recipe (which includes egg yoke). Otherwise, I recommend you follow the alternative recipe for a quick and delicious pudding or for use in a cream pie. 


2 cups 2% milk
1/4 cup sugar
2 tablespoons cornstarch
1/4 teaspoon salt
1 teaspoon vanilla
1 tablespoon butter
2 egg yolks, lightly beaten


Directions:
Combine sugar, cornstarch, and salt in a saucepan. Slowly stir in milk (a very small amount initially to form a thick paste.  To make sure there aren't any lumps, I use a wooded spatula to "flatten" them before adding more milk). Cook while stirring over medium heat.  When mixture is thick and bubbly, reduce heat and cook two minutes longer (while still stirring). Remove from heat. Stir a small amount of the hot mixture into the egg yolk, then return all to the pan.  Bring to a gentle boil while stirring constantly, then cook (while still stirring) one minute longer. Remove from heat. Stir in butter and vanilla. Cool for 15 minutes, stirring occasionally. Transfer to dessert dishes. Cover and refrigerate for 1 hour.

***Alternative Recipe***
Make as above, except: omit the egg, double the sugar to 1/2 cup, and use 3 tablespoons of cornstarch instead of 2.


This recipe makes about 2 cups of pudding.


Update: This post (from several days ago) has been submitted to the Simple Lives Thusday blog hop: http://gnowfglins.com/2011/02/23/simple-lives-thursday-32/

Saturday, February 12, 2011

My Mustard Recipe

Update: This post (from several days ago) has been submitted to the Simple Lives Thusday blog hop: http://gnowfglins.com/2011/02/17/simple-lives-thursday-31/

Grind 3 tablespoons of whole mustard seeds, leaving them mostly whole.  You may use a grinder or mortar and pestle.


Stir in:
3 tablespoons mustard powder
1/2 teaspoon salt


Add:
3 tablespoons cold water
1 tablespoon cold cider vinegar
Store in a glass jar in the fridge (or a cool area) for a full day before sampling.  Really, you don't want to taste it that first day; you just might throw it out!
After the first day, I decide if I like the consistency.  If I'd like a smoother mustard, I blend it to the desired texture.  Once you know the consistency you prefer, you can make the adjustment on the front end (during the grinding) and eliminate the need for a blender.

Sunday, February 6, 2011

Michael wanted Fajitas for the big game...

I sauteed onions and peppers with a little olive oil and Fajita spices.


The chicken and beef strips were marinated in orange juice and more Fajitas spices.


Okay, let the game begin!


Even Drake came by to support Green Bay!  Or did he come by to support Fajitas?


I tried to deliver a dog-o-gram to Dara in a bandanna... he's still wearing it, but I'm not sure if Drake delivered his message.

From Mike, Heidi, and Drake... Go Packers!  Ummm, Drake says Go Fajitas!

Thursday, January 27, 2011

Homemade Manwich (Sloppy Joes) with Homemade Potato Chips

Last night I made homemade Sloppy Joes (not from a can). Recently, I read a post that made my mouth water for homemade chips: (http://kellesneverdonefarm.blogspot.com/2011/01/if-people-only-knew-how-good.html) ... perfect for Sloppy Joes!

After soaking for 30 Minutes, I let the slices dry

I use olive oil to gently fry the slices

I gently salted with sea salt


The more homemade items I make using staple ingredients, the less space we have to use to store cans... and the more money we save.

Monday, January 24, 2011

Boiling Water Pie Crust Continued

I think the boiling water pie crust has great potential.  I'm working on tweaking it more to my liking.

To be continued...

Sunday, January 23, 2011

National Pie Day and Boiling Water Pie Crust

First thing this morning I learned that today is National Pie Day!  Typically, I'm less than excited about new holidays that I've never heard of... but you don't have to convince me to put National Pie Day on my Calendar!

Last summer, while visiting my sweet sister-in-law in Minnesota, I copied a boiling water pie crust recipe out of an Amish cookbook (I know, It totally breaks all of the rules of pie baking)!.  I can't believe it has taken me this long to get to it... but it *is* National Pie Day!  So here I go...

First, Dad is letting me use his beautiful wood biscuit bowl that belonged to Granny... and also reminded me that Joyce (his wife) is the world's best pie maker.  I didn't need reminding, as her pastries and other baked goodies are unforgettable! Scrumptious! However, it *is* National Pie Day and Joyce isn't here... so we'll soldier on and Dad says he'll try a piece. So, check back for the official pie judging results!

Granny's Biscuit Bowl


This is where I'm at now... I'll and let you know how it turns out!  Happy National Pie Day!

Note: I've already found (Googled) another boiling water pie crust recipe that I think I'll like better for mobile use.  I'll have more experimenting to do before I find *the* recipe.  I've always made my pie crusts in the traditional (cold) way.  But I'd like to find a "road friendly" approach.  I'll post my final recipe at some later date.

Sunday, January 16, 2011

Coupons on the go!

Couponing... you clip the coupons for items you use from the Sunday paper, then take them with you when you shop and save money!  What's not to love?  Well, quite a lot actually.

First of all, I don't read the Sunday paper anymore.  Secondly, how do I get those weekly coupons that come in the mail, when I don't always have a mailbox?  Thirdly, do I really want to use expensive ink for e-coupons? Also, I always forget to use that coupon I brought with me!  These are just a few of the issues I have with using coupons!


Click "add" and the coupon is stored in your grocery store's club card

Okay, maybe *you* all knew this, but I was completely in the dark about all the great modern couponing options that are attached to the little club card you pull out at the check-stand!  Then, a few days ago I was looking for the online flyer for the local Port Angeles (WA) Safeway, and I saw the light!  Did you know that you can view local weekly sales flyers online, then click on the coupons area and load the coupons you'd like to use?  The coupons are then "stored" on your card... so if you buy the item before the expiration date the coupon amount is automatically taken off the grocery bill.  You don't even have to tell them you're using coupons! 


There are many stores that have this couponing option... Fred Meyer is another one that I specifically checked on.


If you don't see all the coupons you want at your "regular" store's site, I also found out there are other sites that will add coupons to your store's card: 
Cellfire.com, PGeSAVER.com, Shortcuts.com, Upromise.com...
I haven't used these sites yet, but I'll check them all out before my next shopping trip.


I don't know if I'll ever be one of those extreme-super-coupon-saving-shoppers, the kind that get their groceries for free and speak in a language I don't understand (with lingo like "price matching" and "doubles"), but it's progress!

Teriyaki Glaze


When making a one-pan rice dish, I often make a quick homemade teriyaki glaze to go with it (as seen here):
http://vansteaders.blogspot.com/2010/12/one-pan-rice-and-veggies.html


The "recipe" is *very* simple... and have you checked out the price of the store bought stuff lately?!  It's great for travelling because you don't have to refrigerate the opened bottle (as with the store bought)... you can make it as you need it.


The basic recipe goes something like this:

1/2 cup soy sauce(we like the low sodium variety)
1/2 cup sugar
1 small garlic clove, minced (or more if you like)
2 tsp vegetable or sesame oil (I use an extra light olive oil)
3/4 to 2 tsp ground ginger (I use 1 tsp usually)
Also:
1/2 to 1-1/2 Tbsp red wine vinegar (*optional* - I sometimes use 1/2 Tbsp)
corn starch (optional)


Stir all ingredients together (except corn starch), while slowly heating to a boil over medium heat.  When the sauce has come to a boil the sugar should be completely dissolved.  If you'd like a thicker sauce, add a little corn starch (a pinch at a time) until you reach the desired consistency.


After you make it a few times, you'll know exactly what flavors (and amounts) taste best to you!  You really can't go wrong and it only takes minutes... so give it a try!


This sauce makes an excellent marinade too!

Sunday, December 26, 2010

Garlic Bacon Olive Pasta Something-er-other

I've been told I have to wear a mask or stay at least 5 feet away from Michael.  That being the case, it's time for cooking with garlic!


We haven't had refrigeration in some time, so I've been doing  a lot of cooking with items that don't require it.  I had some Spaghetti, so I started with that.  I also had garlic cloves, a jar of real bacon bits, a snack size can of black olives, and a small bottle of grated Parmesan cheese (unopened).  I've been looking for a block of Parmesan cheese, but the small grocery stores in the area don't carry it.  Sometimes you just have to use what's available at the homestead.


Cooking for one person can be challenging.  Spaghetti (or any pasta) is a good choice. Dried and uncooked Spaghetti the size of a quarter, will yield about a cup of cooked pasta.


While cooking the Spaghetti, I chopped up a clove of garlic and added it to some olive oil. When the Sphegetti is cooked, I simmer the garlic while also adding some dehydrated minced onion (I didn't have fresh) and a generous amount of real bacon pieces.  I sliced up the snack can of black olives, then added the garlic/bacon mixture and olives to the Spaghetti. I topped it off with a *little* sea salt, freshly ground pepper, and Parmesan.

It tastes *much* better than it looks!

I had a cup of mint tea to complement this dish... but it would also love to be flattered by a glass of wine. ~grin~

Monday, December 13, 2010

One Pan Rice and Veggies


I have much more sophisticated cookware, but I just keep coming back to my cheepy nesting camping pans (most often the smallest of them).  In this example, I throw a portion size (about 1/4 cup) of Basmati rice into the bottom of the pan with a little cold (or room temp) water.  I swish it around and dump the water, removing the excess starch.  I add twice as much water as rice to the pan and place the steamer basket on top.  Add whatever vegetables you want to steam to the basket. I often choose broccoli or snow peas with mushrooms. Place the lid on your pot, bring to a boil, and simmer for about 12 minutes.  If you'd like to make a quick homemade glaze in the pan lid (takes only a few extra minutes) you can add teriyaki glaze to the meal (without need for refrigerating an opened bottle).

I make this quite often for breakfast.  We don't have any rules as to what we can eat during a certain part of the day.  Besides, how would we know when the standard "food rules" apply, since we don't ever know what time it is? ~grin~

Since I make it so often, I mix it up using many different combinations of spices and other ingredients.  I always add a little olive oil to the rice.

Sometimes I have the vegetables on the side and use curry on my rice.  Also, adding a little butter powder to the olive oil, then sprinkle real beacon bits over the top (hey, there's your breakfast food)! 

Other times I opt for adding canned chicken to the teriyaki glaze... well, the possibilities are endless so I'll try to post a few pictures here as I make different combinations.

Each combination is delicious and it only takes one little pan. I can eat out of the small pan (or lid) and clean up is a breeze.

So you can see the ingredients, I'll dump it on a plate... 


~more one pan rice pictures will be added later~ ~homemade Teriyaki Glaze to follow~

Monday, December 6, 2010

Yogurt Leather


Picture linked from Kids and Canning Jars


When I saw this post about yogurt leather at Adventures in Self Reliance, it reminded me of another yogurt post I'd recently read at twokniveskatie.blogspot.com. First butter... now yogurt; who needs a fridge?!


In the process of looking up additional information, I discovered a great new blog (new to me)... and I learned all I need to know about the process!


Check it out: Kids and Canning Jars

Sunday, November 28, 2010

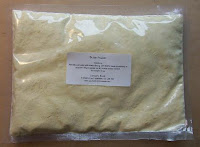
Butter Powder!


We've had some refrigerator issues this month, so I've been trying to figure out many recipes without items that require it.  I needed to make a white sauce today.  While searching the pantry for various fats (oils) I could use in place of butter, I found BUTTER!!!


A few years ago I'd bought dried butter and eggs from the Kitchen Kneads store at 7579 Redwood Rd West Jordan, UT (801-561-9616).  Kitchen Kneads is an excellent bulk pantry store!  They have great off-grid products... I also got my sprouts and many other supplies there. If you're in the area, stop by: here.


Anyway, I found the butter and it *still* looked great!  I reconstituted the proper amount and used it in my white sauce.  I may have used a touch too much, as it was very buttery indeed, but also tasty! It sure does pay to keep the Vanstead stocked with the basics!


As with most things, you may also find it at amazon here:
Butter Powder!

Saturday, November 20, 2010

Sprouting Out!

Need some green this winter?  What about sprouts?


Why?: http://www.living-foods.com/articles/sprouts.html ... Wow!


These lids make sprouting a breeze and they double as strainers for *everything*!
Sprouting Lids


Sprout People is also an excellent resource.

Saturday, October 23, 2010

Canning Chicken

Written night before last:
We made it to the Flying J truck stop in Brunswick, GA before stopping for the night.  A few minutes ago, I learned that my son had just returned to base at Kings Bay, GA after being on his boat (submarine) for months.  It turns out, I'm only about a half hour from him tonight!  Welcome home Son!


Now
We were able to see Zach for a few minutes yesterday. Today is my birthday... and we'll spend the day with "she who gave birth to me" ;).   We're in Sebastian Florida at my mom's house.  Yay! 
__________________________

Canning Chicken


Also written night before last: I decided to make Chicken Alfredo over pasta tonight.  Before we left Washington, I pressure canned half pint jars of boneless chicken breast (using the raw pack method).  For an easy meal, I added it to some Alfredo sauce. It was wonderful!  The best part is that I know exactly what's in it... just chicken!


I first learned about canning chicken from a Wendy Dewitt YouTube video (part 6 in the series... I think): http://www.youtube.com/watch?v=33bovjbt8nk.  She also has a pdf called Everything Under The Sun that has some great information.


Before you can anything, it's a good idea to check the latest USDA guidelines to make sure you're canning safely.  Consult your pressure canner manual for the specific times and further recommendations. 


One further recommendation:
After doing a ton of research, we decided this was the only pressure canner for us:
Our Pressure Cooker/Canner.  I'll have a lot more information to share about this canner in other posts!  Our pressure canner fits under the bed and I store our dry goods in it... so it isn't really taking up additional space.

Ad